Pratley has a wide range of versatile and cost-effective DIY adhesive products for a multitude of quick, on-the-spot automotive repairs. Our products are ideal for areas where workshops are sometimes unavailable. Here we show you how to do a a car bumper repair using Pratley adhesive products.
What you need:
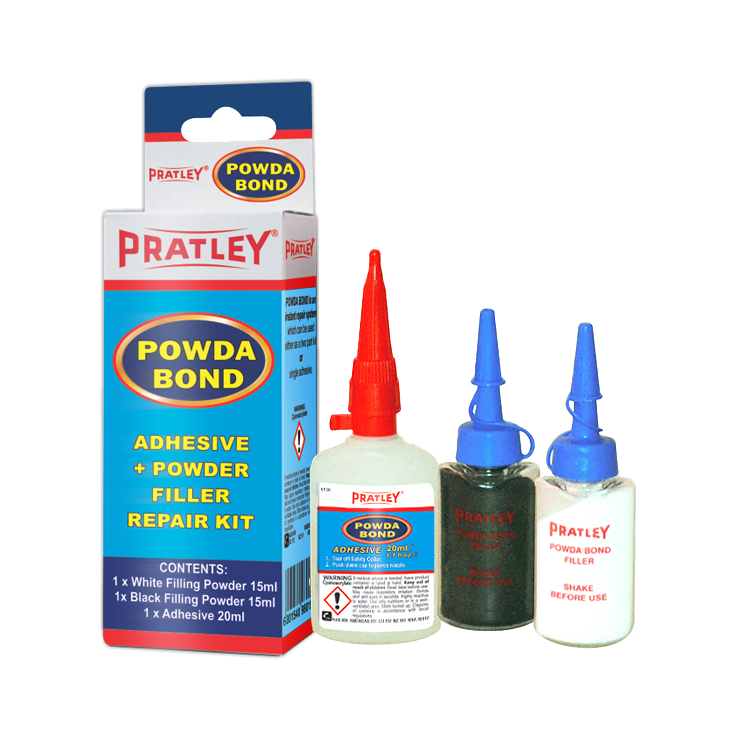
- Pratley Powda Bond® kit
- A Drill
- Sandpaper
- Hammer
- Optional: Dremel grinder
- Optional: Vinyl polish
Step One:
Read the Pratley Powda Bond® instructions thoroughly.
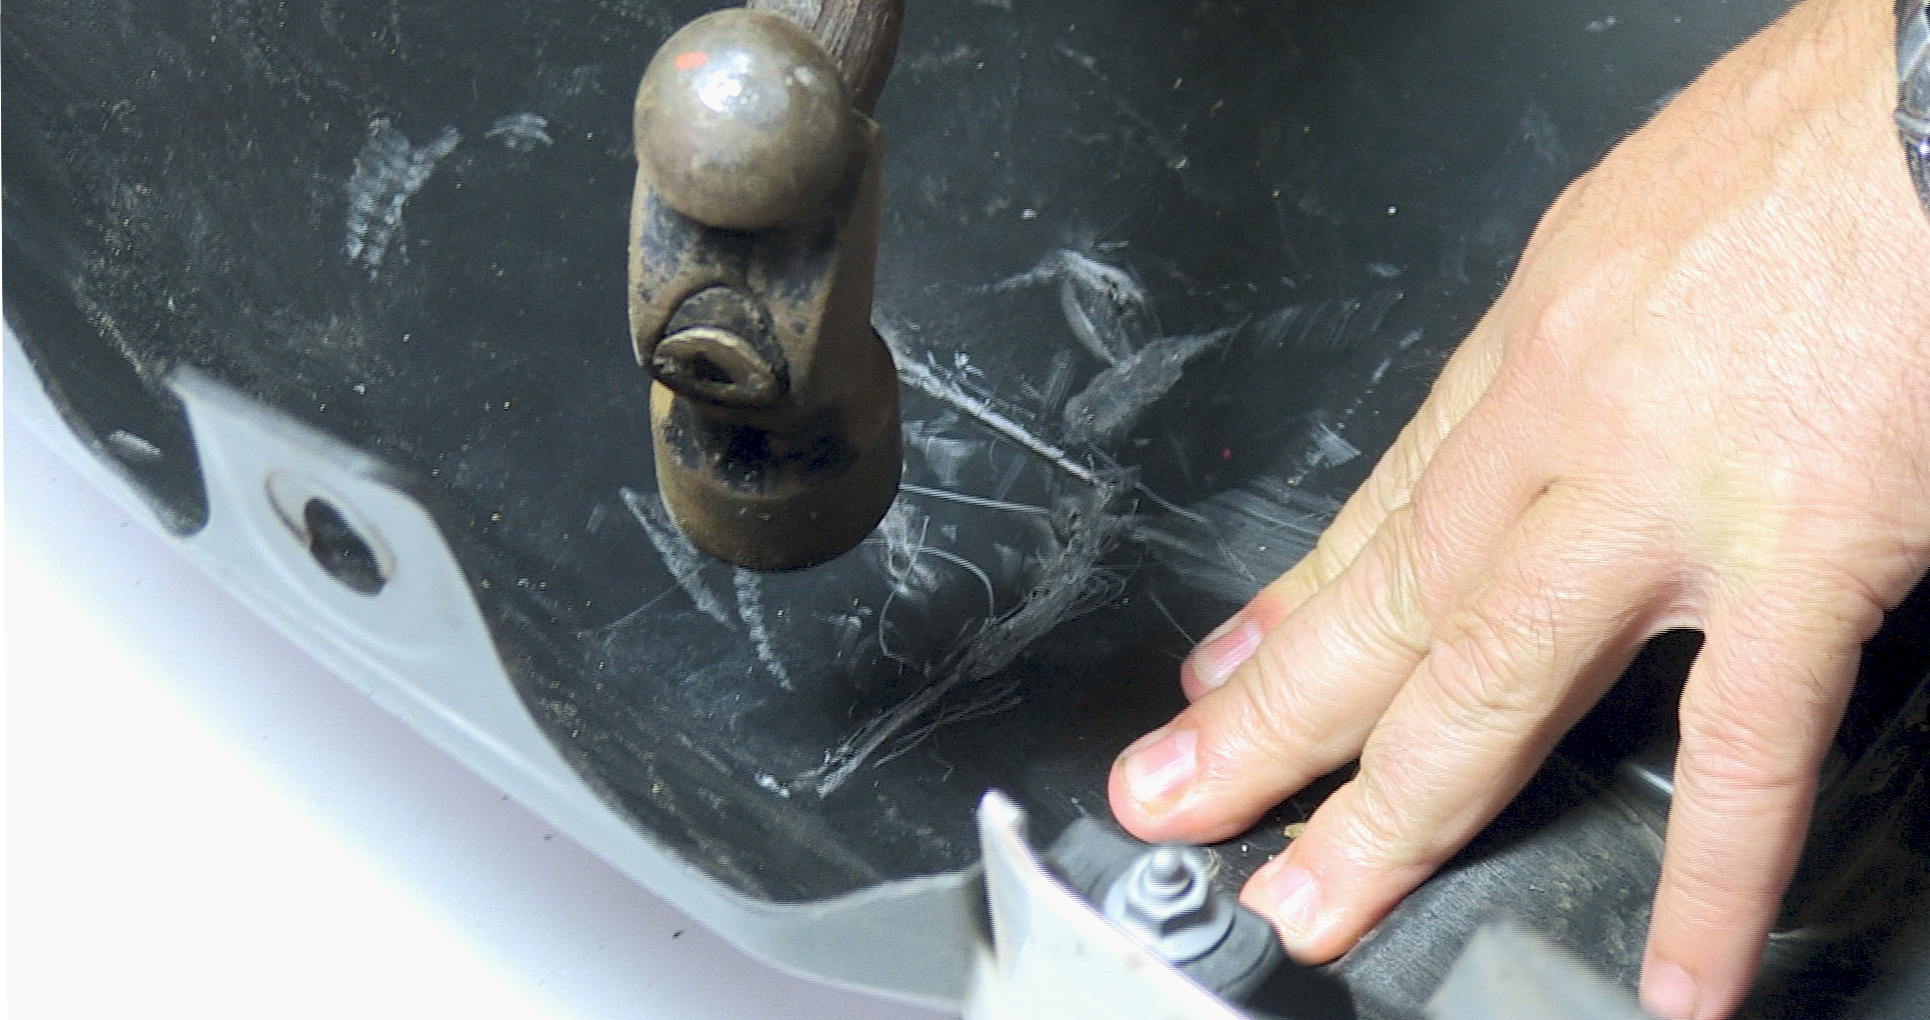
Remove the bumper so you can work on the back of the bumper for a smoother finish.
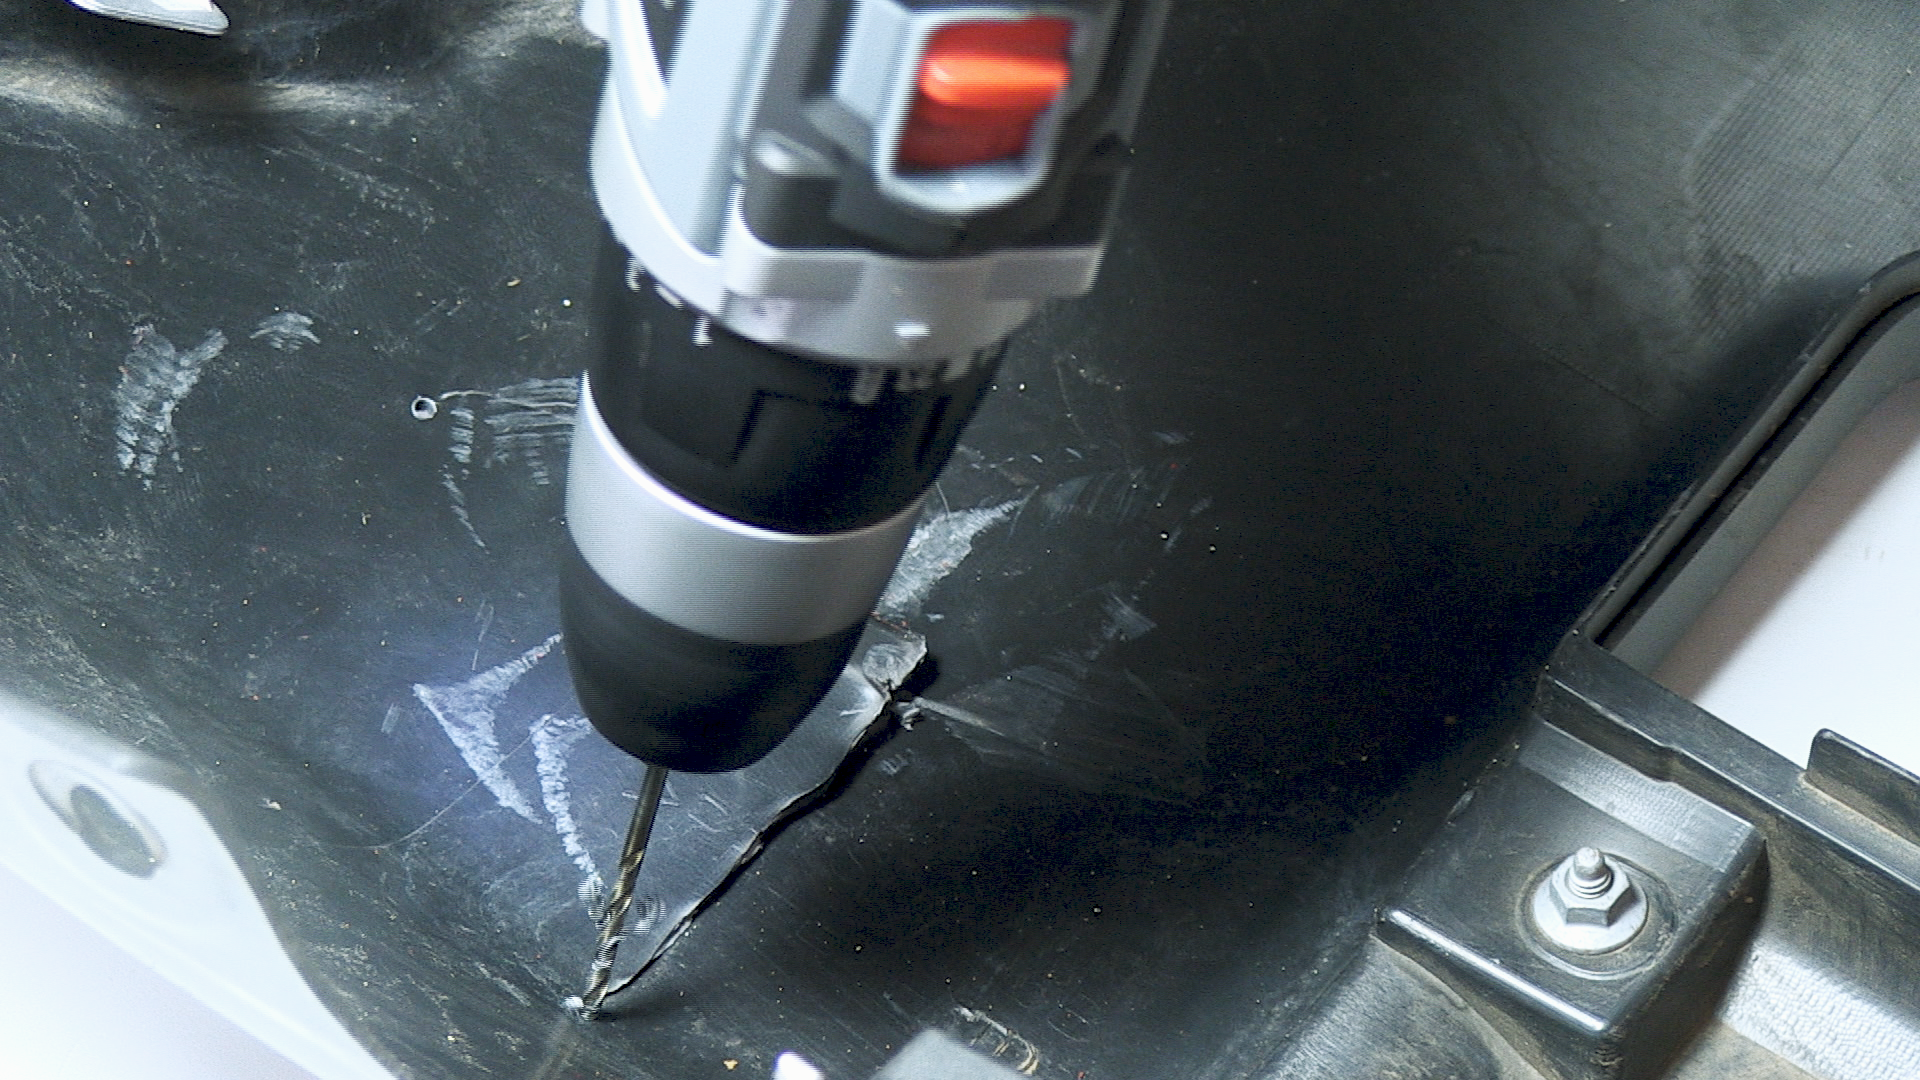
Drill small holes at the ends of the crack. This will help to ensure that the crack does not run further or spread. Roughen the area around the crack with sandpaper.
Step Two:
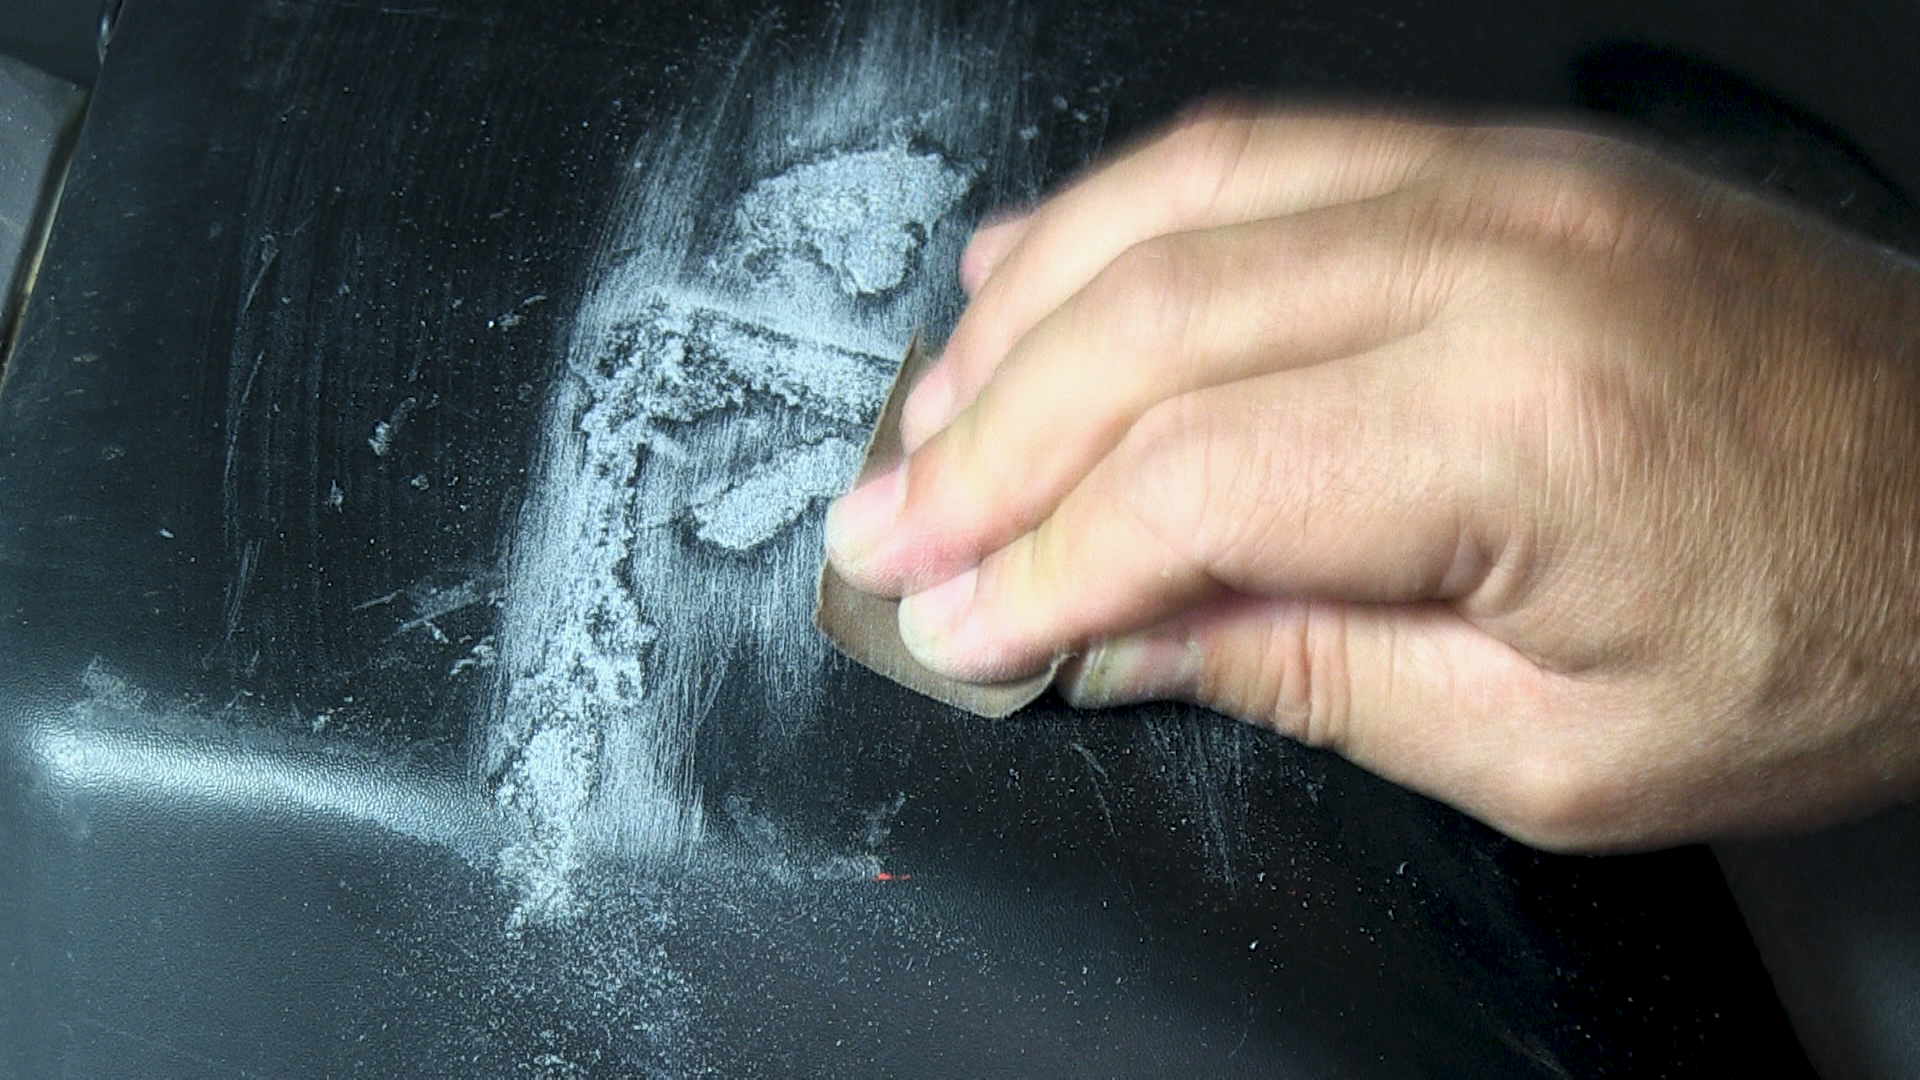
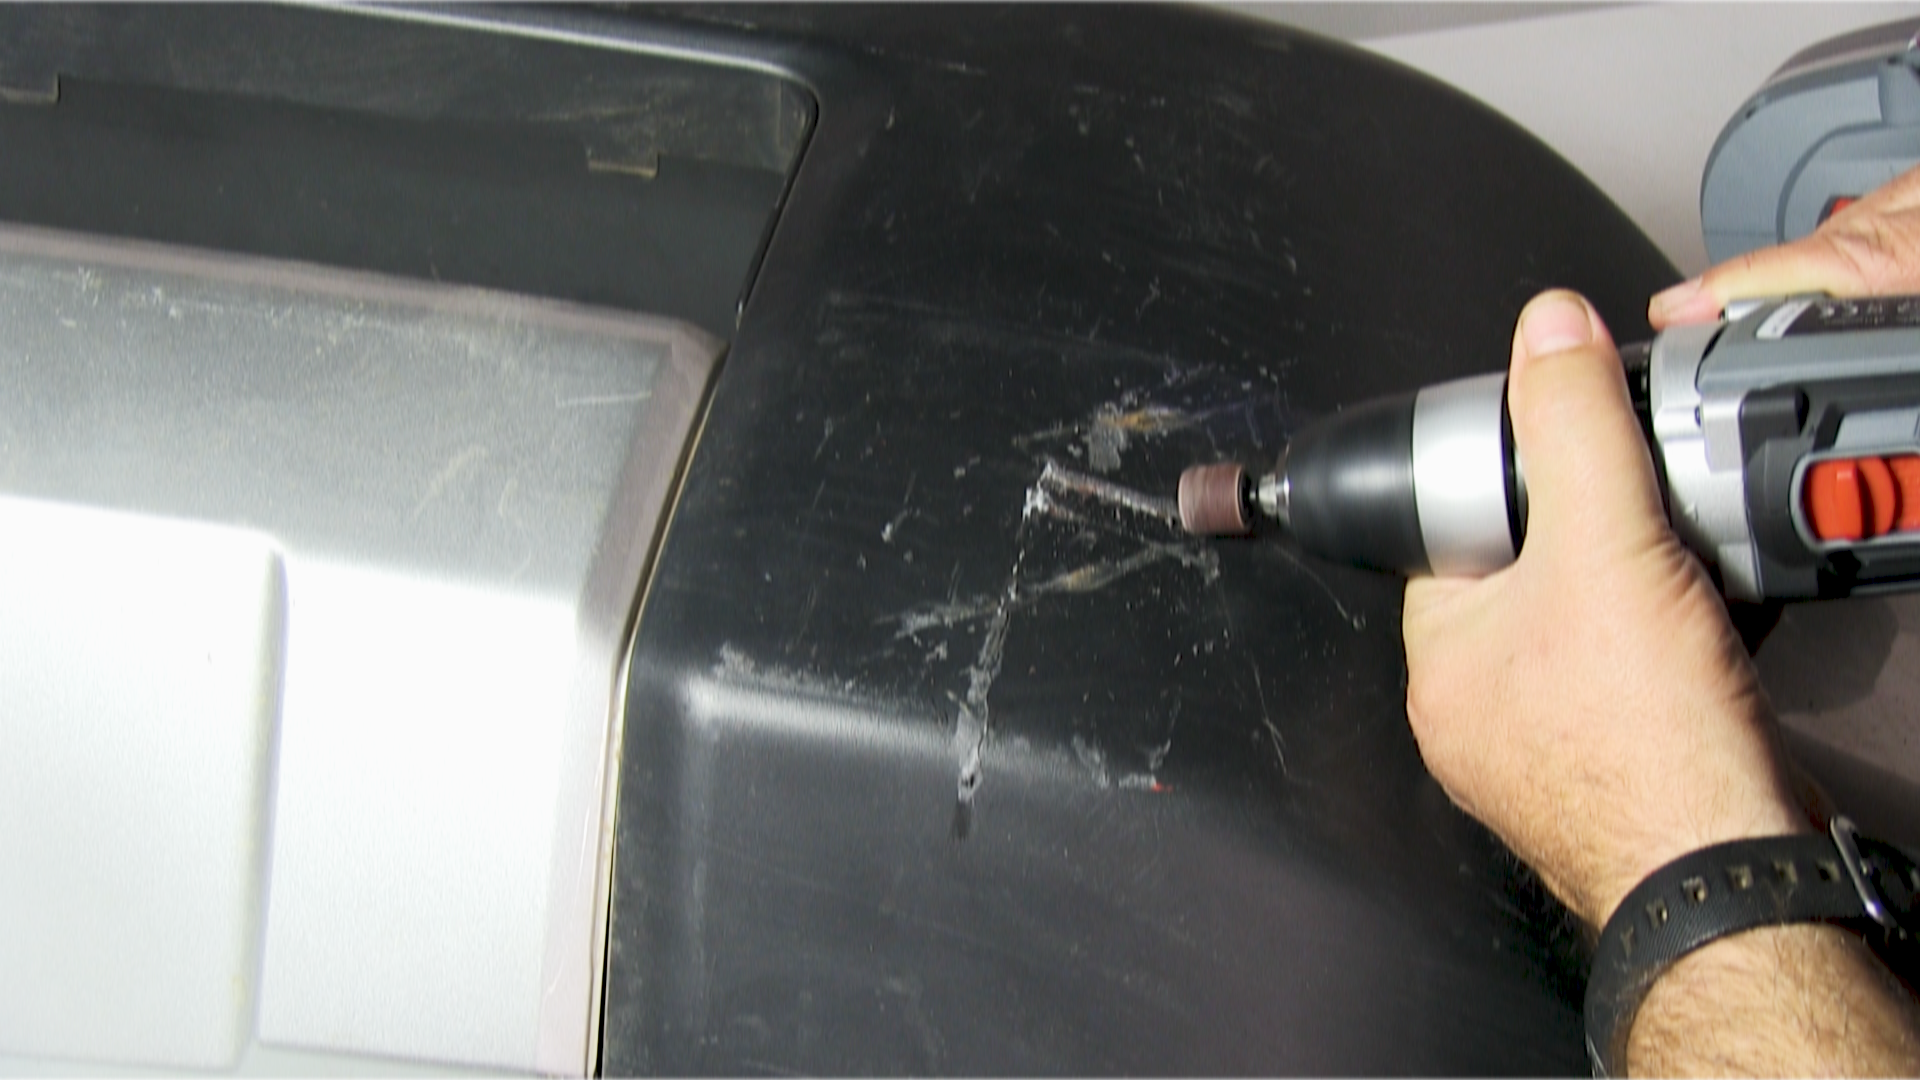
Use a hammer to tap the bumper in place. Use sandpaper (or if you have a Dremel sander) roughen the area around the crack to have a coarse texture. The Dremel sander is also ideal for creating a slight V-shape in the crack. Clean off any excess dust or oil thoroughly using industrial acetone.
Step Three:
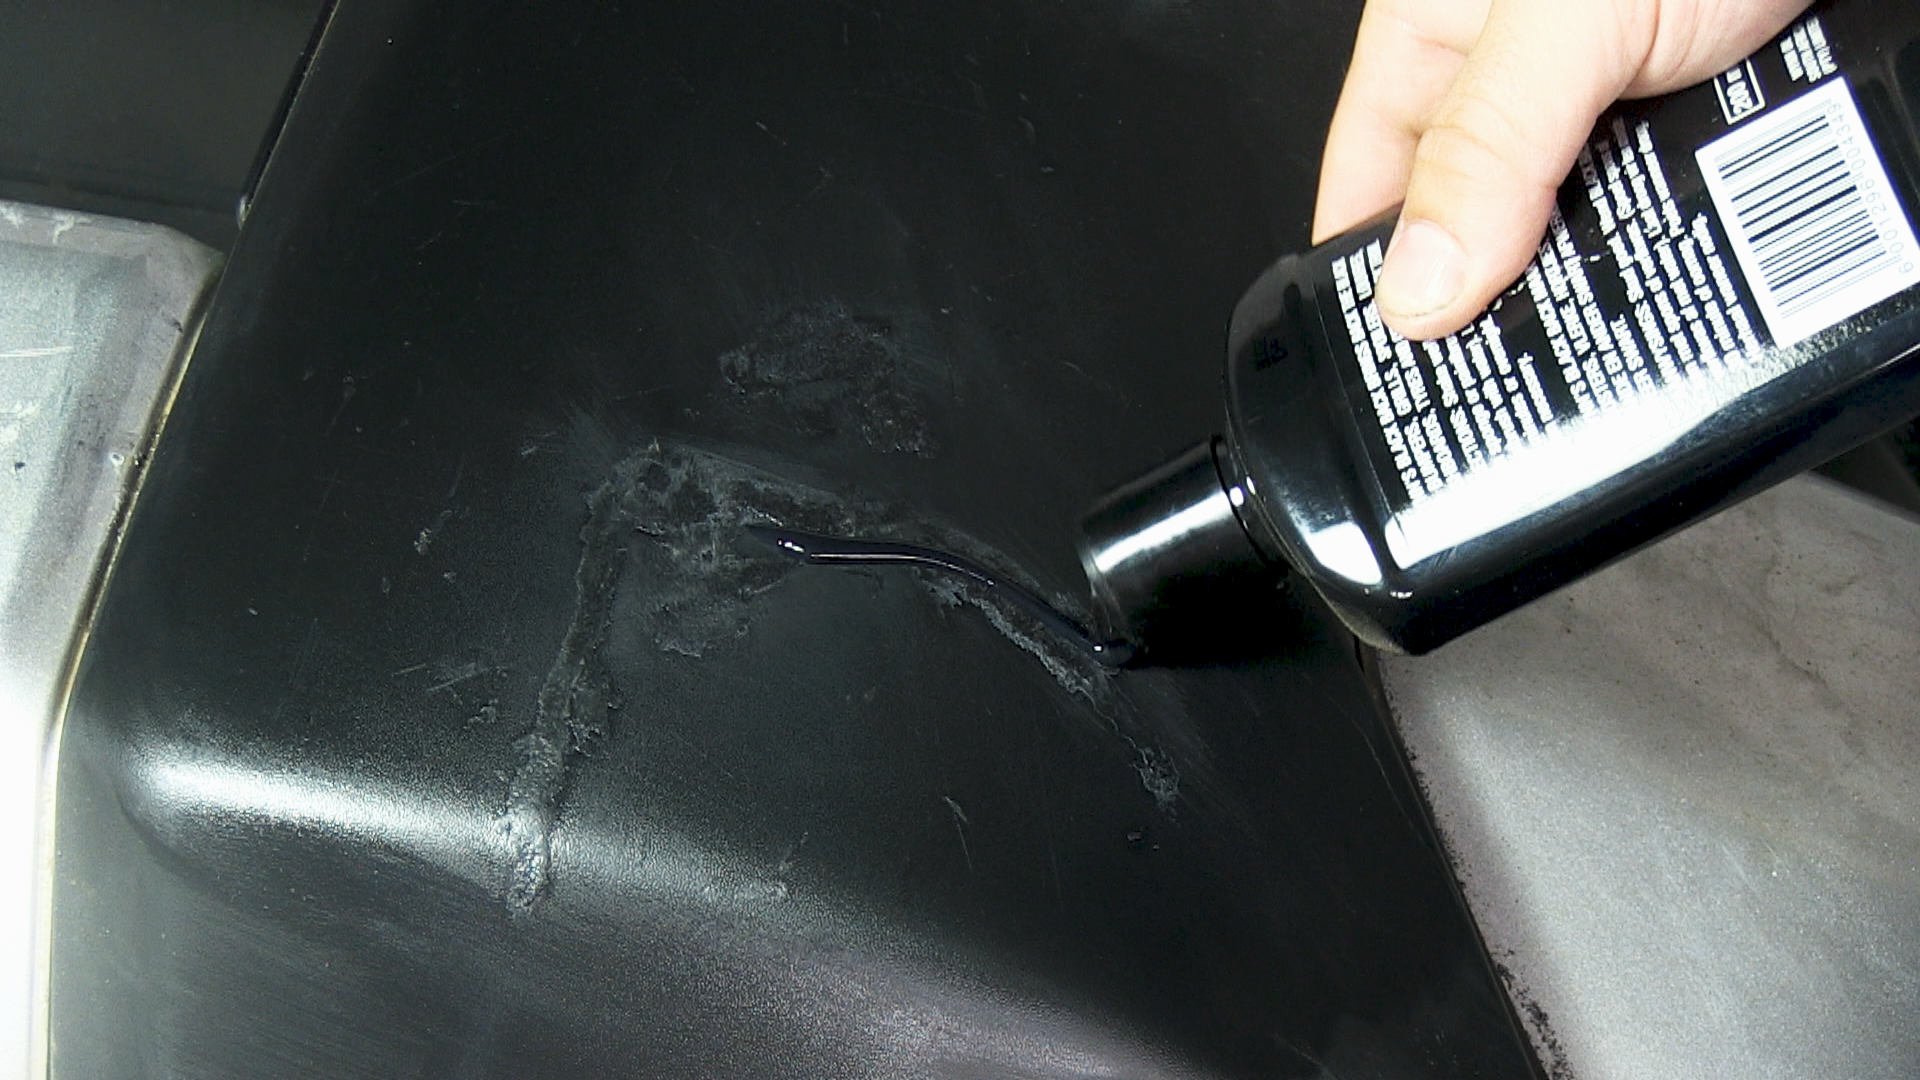
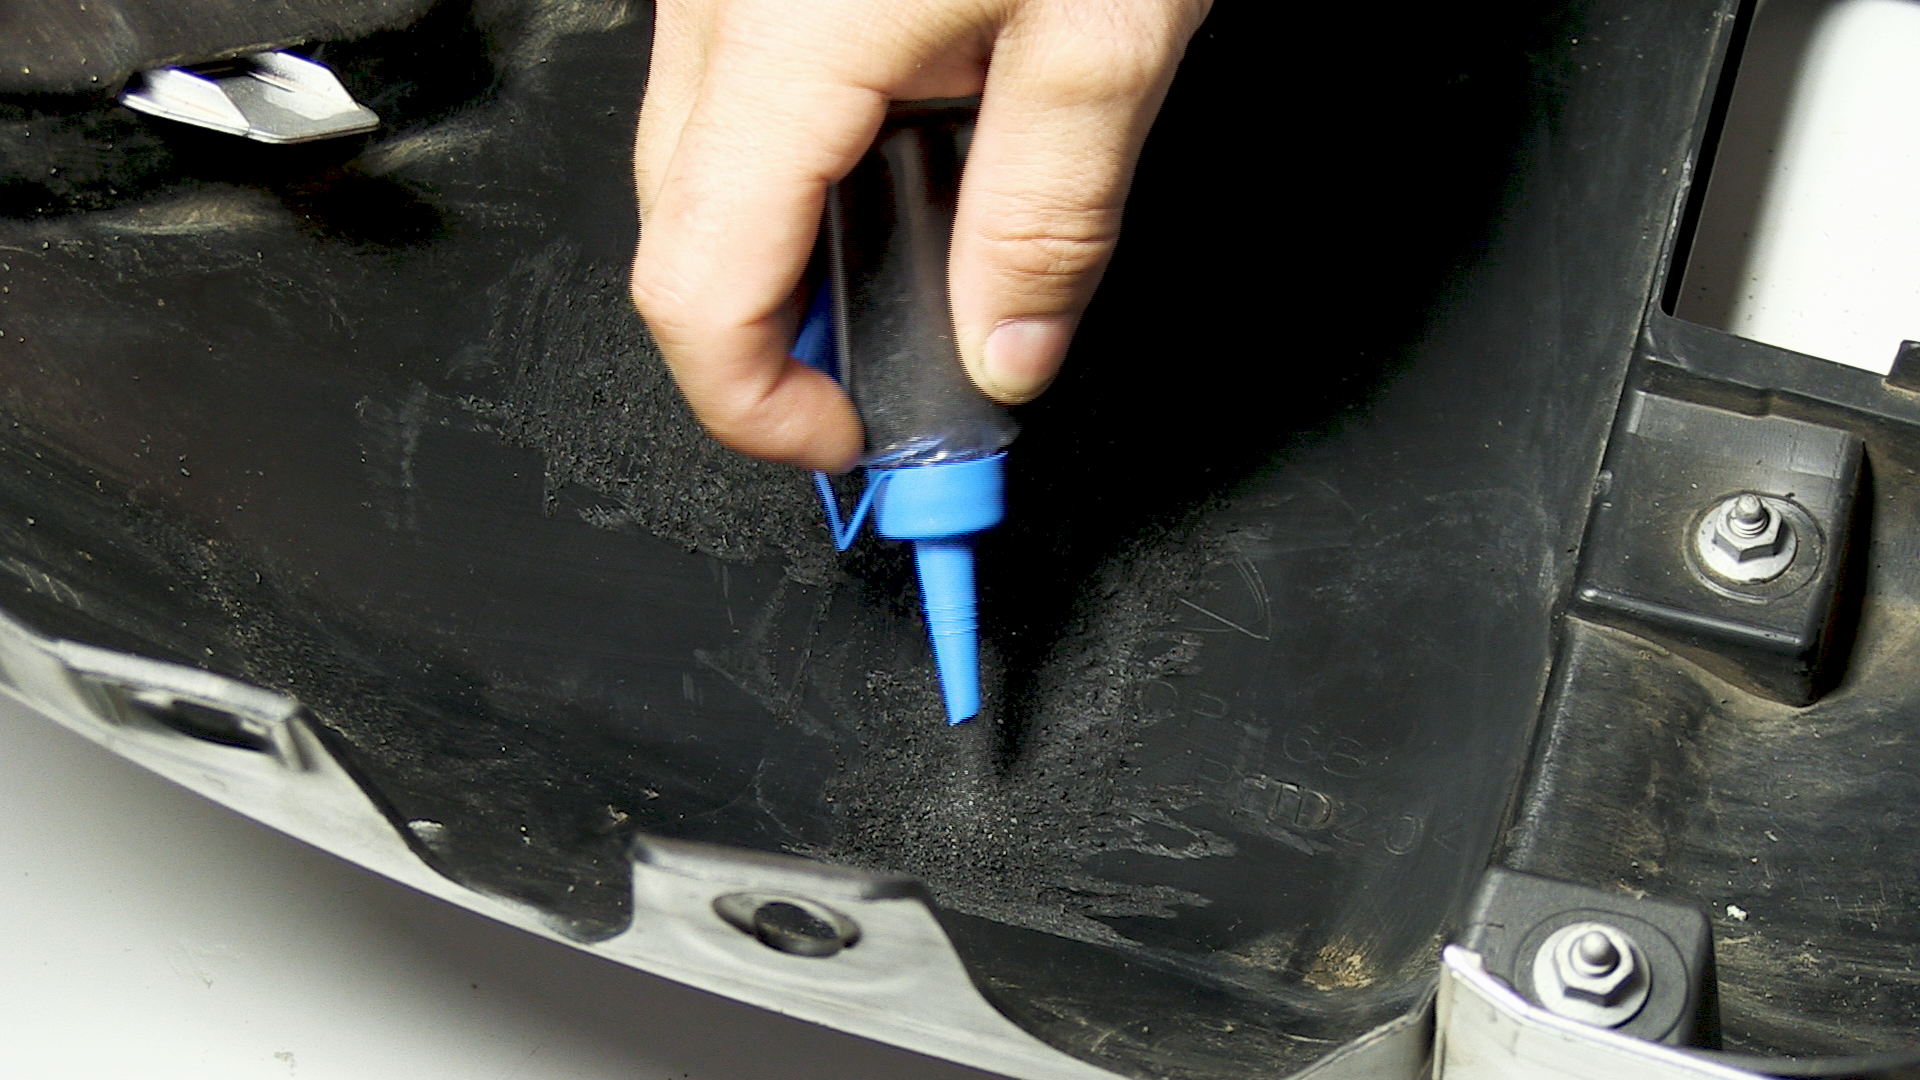
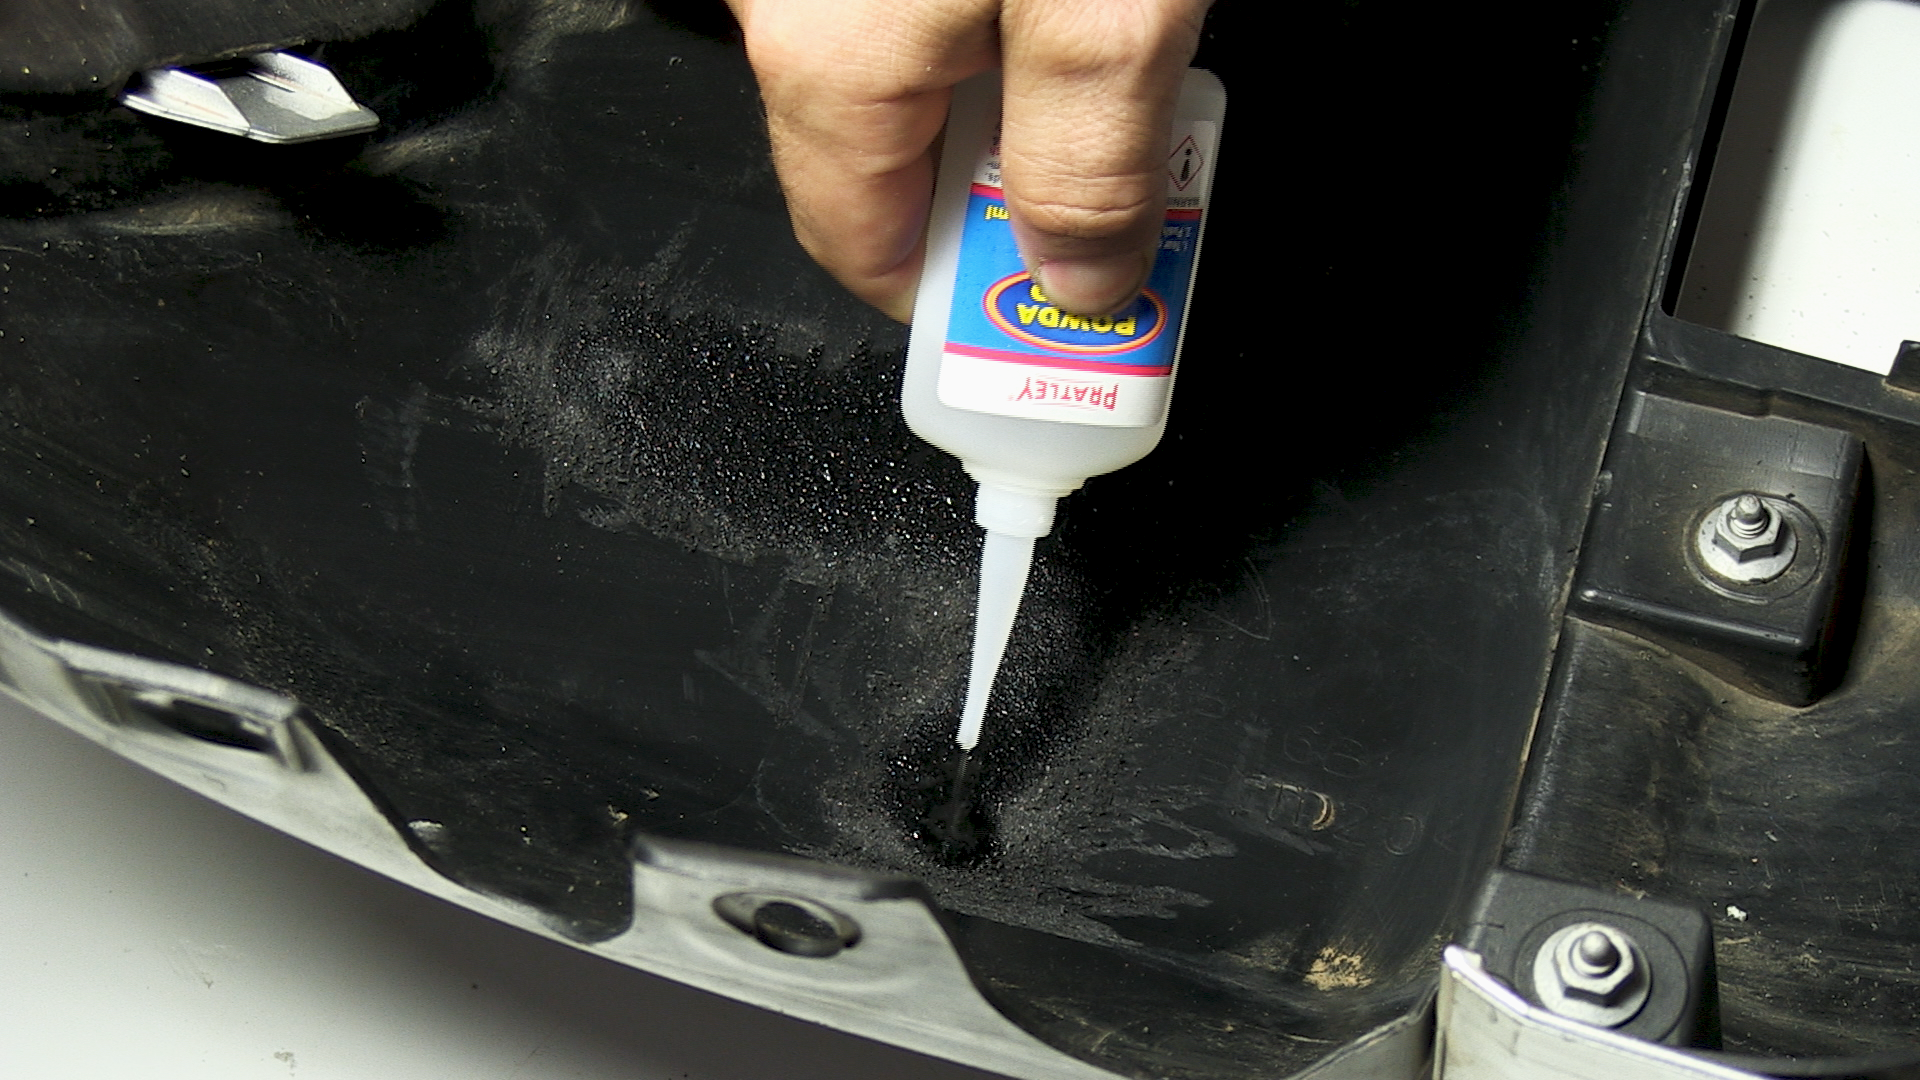
Using the black powder from the Pratley Powda Bond® kit, pour and cover the entire area of the crack. Using the special grade Powda Bond® adhesive found in the kit, apply a sufficient number of adhesive drops so that it soaks into the powder filler completely. It will produce a little smoke as the adhesive is activated.
Step Four:
Roughen the front of the bumper with sandpaper and repeat Step Three until the area is fully covered.

Step Five:
Sand down the repaired area and wipe away any dust and oils with industrial acetone. For best results, you can use vinyl polish to buff the mended area.